1. Install the App
- Visit the monday.com marketplace, find Google Tasks & Calendar Sync, and install it to your account.
Open your board → click the + icon at the top → select Apps → choose Google Tasks & Calendar Sync from the installed list.
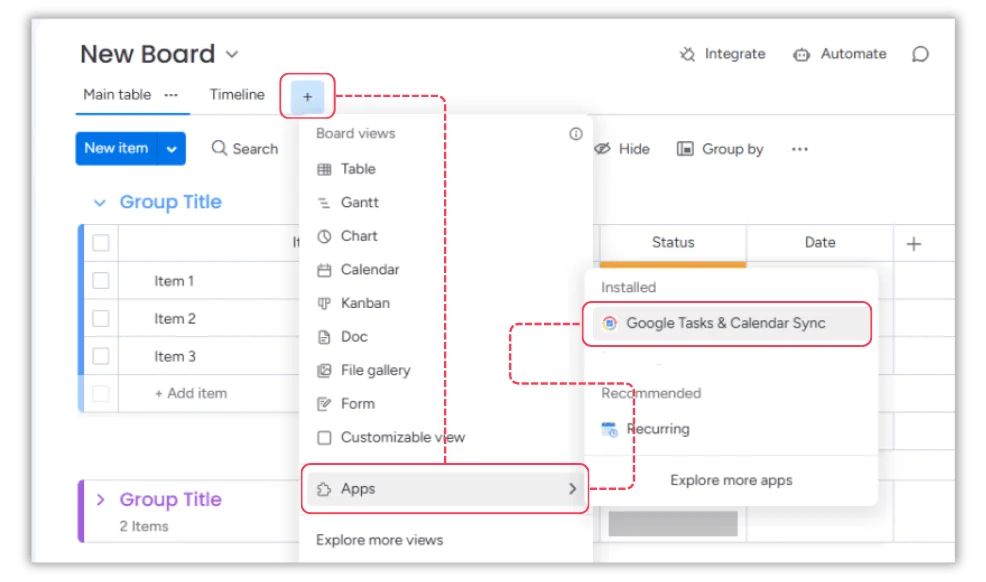
You’ll be taken to the authentication page to connect your accounts.
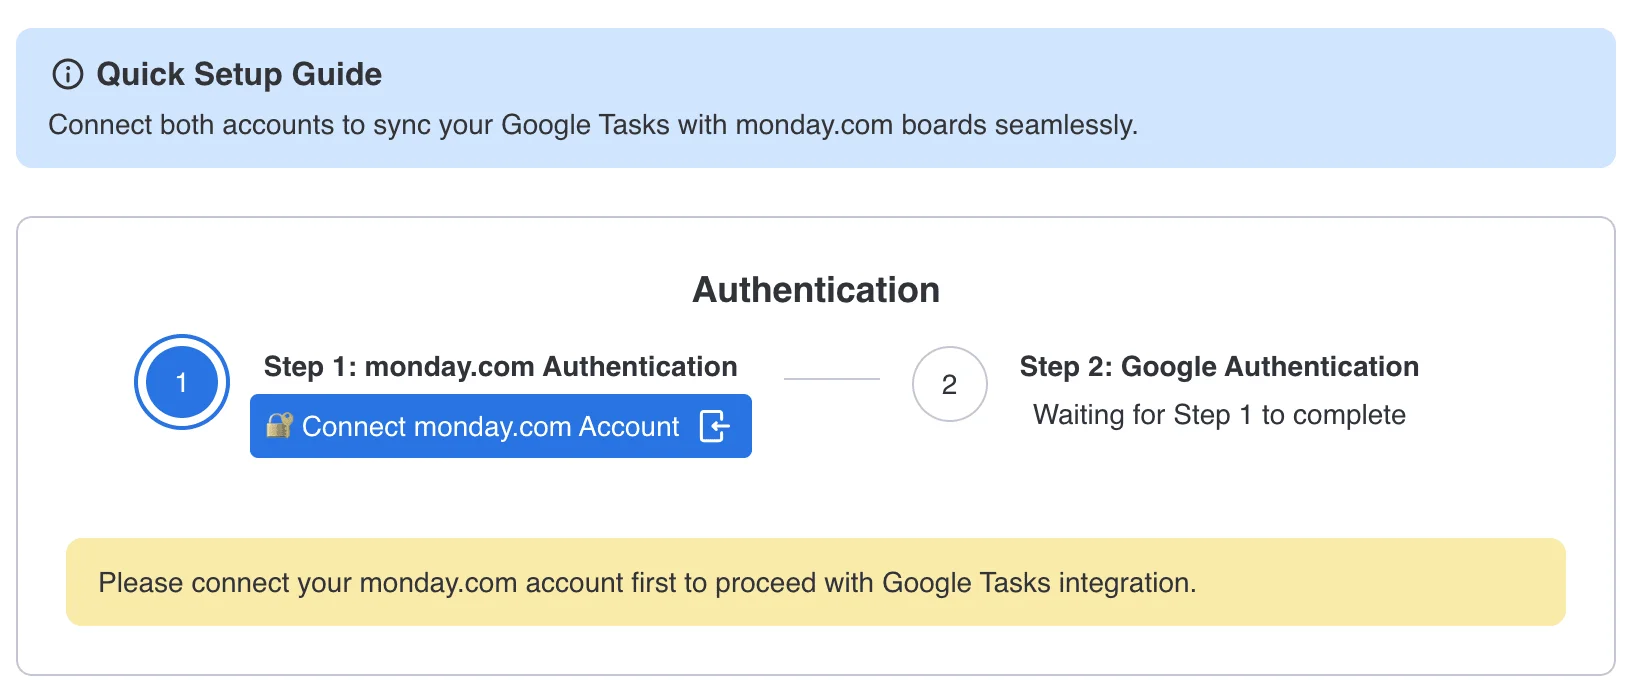
2. Authenticate Your Accounts
- Step 1: Authenticate with monday.com
Approve access so the app can integrate with your board.
- Step 2: Authenticate with Google
Grant access to the Google account you want to sync.
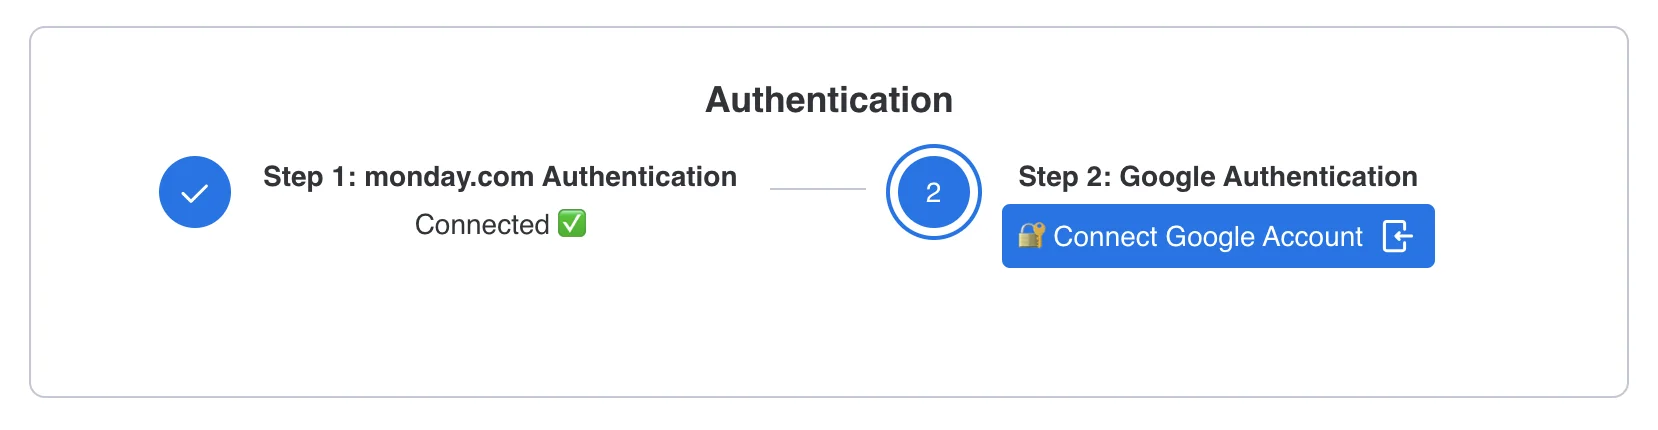
💡 Need to switch accounts later? Just disconnect your current Google account and re-authenticate with another.
3. Set Up Your Board
Group & List/Calendar Mapping
You can connect multiple monday groups to different Google Tasks lists or Google Calendars.
Example:
-
“Onboarding” group → New Hire Task List
-
“Team Projects” group → Team Calendar
-
“Events” group → Company Calendar
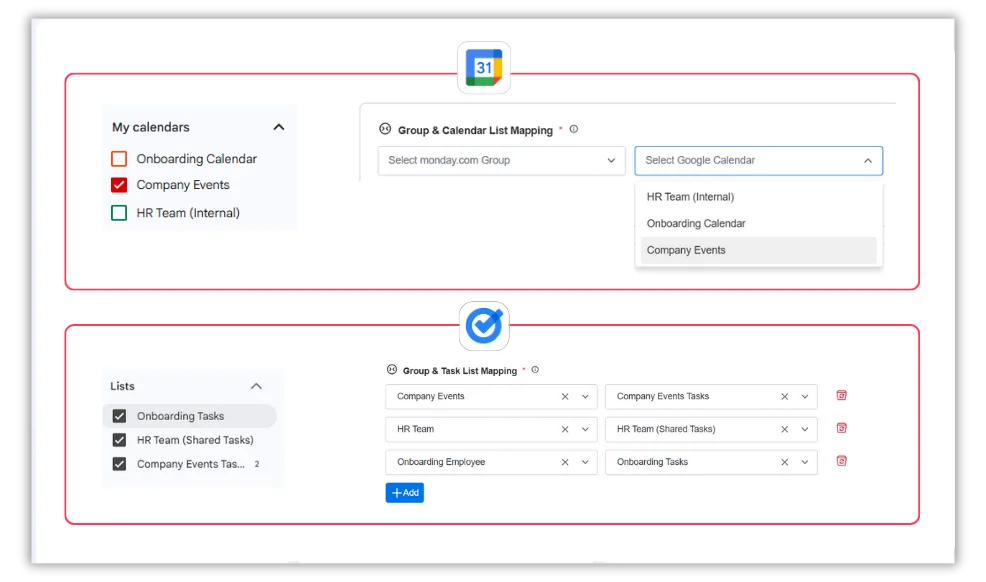
To add another sync, click Add. To stop a sync, click the Delete icon — tasks and events stay safe on both sides.
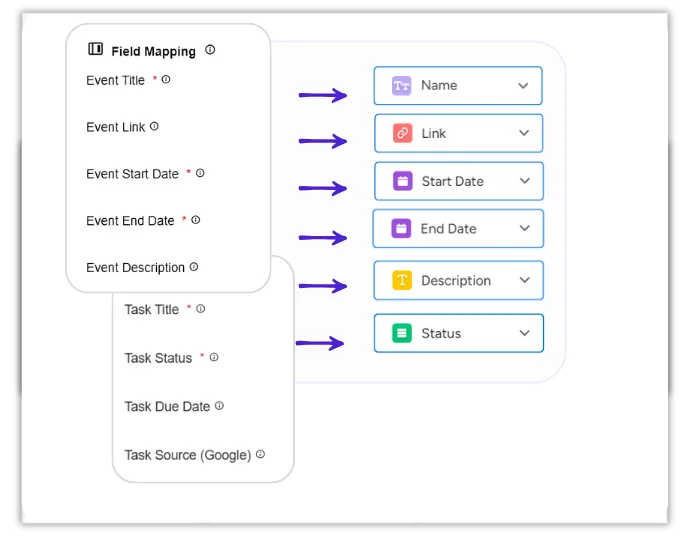
Field & Event Mapping
Map details from Google to monday columns:
-
Task Title / Event Name → Text column
-
Status → Status column
-
Due Date / Event Date → Date column
-
Task Link / Meeting Link → Link column
Need a new column? Select Add Column, name it, and assign it to the Google field you want.
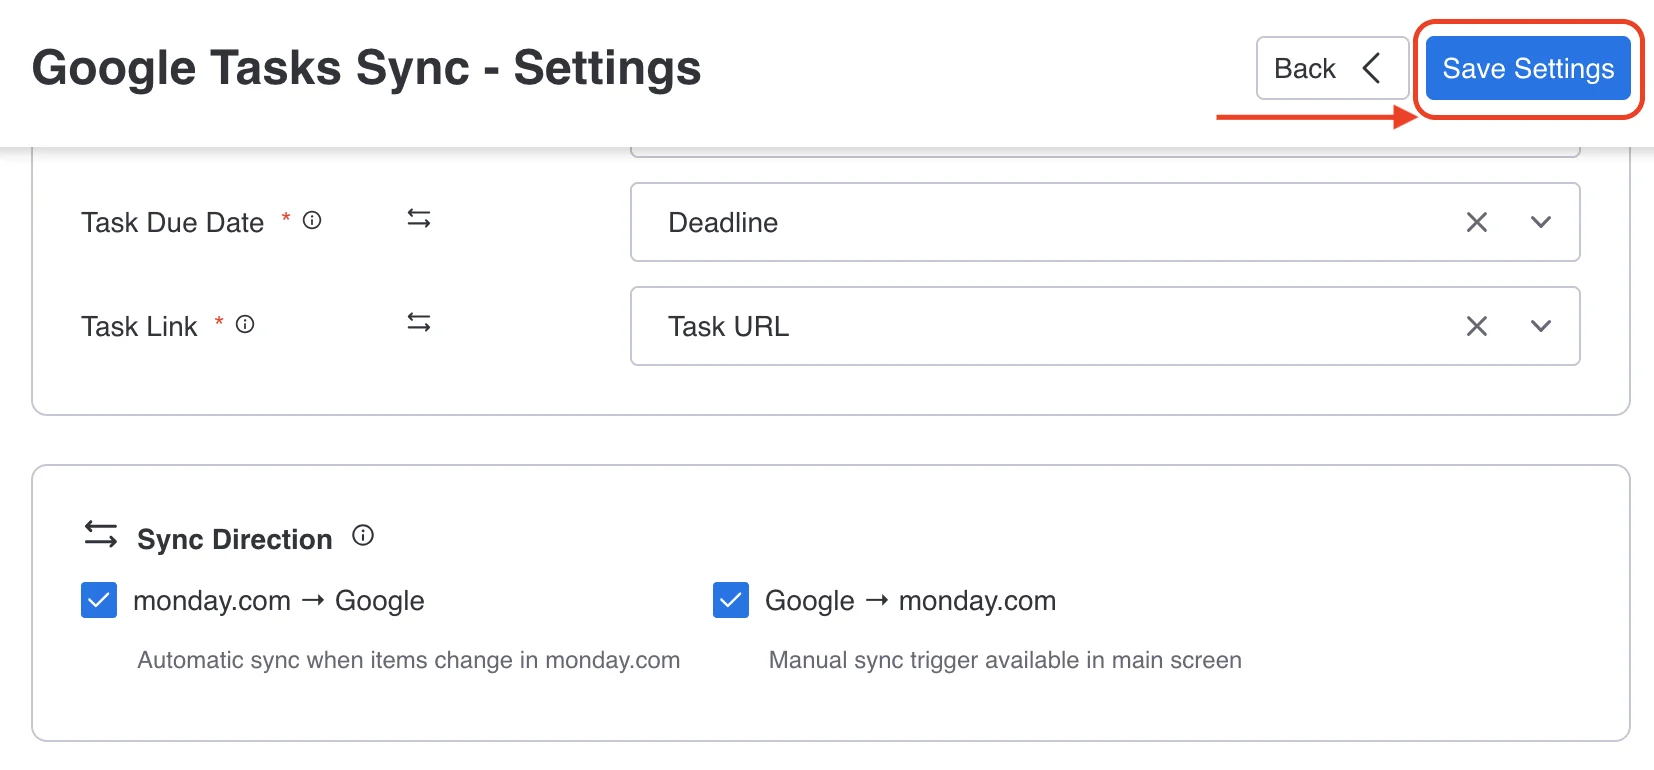
Sync Direction & Options
Decide how data flows:
-
One-way (Google → monday or monday → Google)
-
Two-way sync (updates both sides)

Save Setting
Don’t forget to click Save Setting button once you’ve setup all the fields. By doing this your column mappings is set.
This is how you set up the integration and configure syncing between monday.com and Google Tasks.